The Pearls! Pearls!! Pearls!!! Blog Hop is coming up this
Sunday, September 15th and I’ve had a few questions from people who
are participating, so I wanted to get some answers out to everyone and also
give you some helpful hints and places to go for information.
*Clicking on the highlighted links through out this post
will take you to other sites/videos with helpful information.
Plus, I will have a 'Link List' at the bottom of this post with websites and video links full of helpful information for you!
Okay, here we go - one question I received was:
“Can I liver of sulfur my finished wire
work piece with my pearls, or do I have to oxidize my metal first and then
create my piece?”
Great question! And,
safety first here, always follow the manufacturer’s instructions on any solution(s)
you are using whether it’s Liver of Sulfur, Silver Black, etc. and always wear
protective eye gear.
Here’s my answer:
You should not place your pearls or other porous gemstones (such as
turquoise, etc.) or fragile beads (painted, AB coated crystals, etc.) into a
solution of Liver of Sulfur.
Technically, you should oxidize your metal (silver, copper,
etc.) prior to working with or assembling your piece.
Now, have I ever placed my finished piece along with my
pearls into a solution of Liver of Sulfur – yes.
Should I have? No, not really.
Why did I do it? Because I was lazy (just stating the truth
here folks!) and I wanted to see what would happen to my pearls. (Granted, I
didn’t do this with my ‘super-good’ pearls!!)
So, what happened?
Well, my pearls came out just fine after about a 30 second
dip in some LOS. Absolutely perfect. Not a problem at all.
See?
 |
Pearl, Turquoise and Sterling Silver Wire
Wrapped Pendant "Freya"
Before and After an LOS Solution Dip |
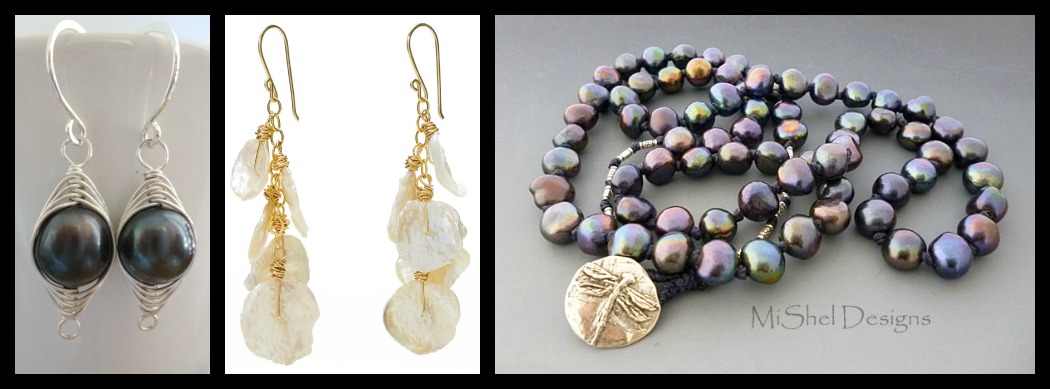
Although, another time, when I left my pearls in some LOS
solution for a couple of minutes, one of them had a dullness to their nacre
that wasn’t there prior to the LOS dip and one time it even turned a white
pearl a rather dull, gray color. It was hard to see right off the bat, but
in certain lights you could tell it had lost its original white color and that
something was a bit ‘off’.
 |
It's a bit hard to see here in this photo, but the pearl on the right has lost
a bit of it's beautiful luster. If I had a before and after pic, it would
probably be a lot easier to tell the difference. |
So, if you have poor quality pearls with extremely thin
nacre or chipped nacre (think large hole pearls that have chips around their
holes, etc.) you will want to LOS your metal prior to assembling your jewelry
if at all possible. If not, then a quick ‘dunk’ might be okay – but then it
might not. So, ‘dunk’ at your own risk,…or well, at your pearl’s risk!
A great alternative if you cannot oxidize your piece until
it’s finished and you have stones in your design that you are afraid may be affected
by a Liver of Sulfur solution is the eco-friendly, boiled egg method!
*The highlighted link above takes you to
Rena Klingenberg's site and also has a video!*
Yes, you can boil an egg, peel it, cut it in half and pop it
in a seal-able plastic bag or plastic Tupperware type bowl, seal it up, and the
sulfur in the egg yolks will eventually oxidize/blacken your piece without
harming your stones/beads. Now, this
does take time,…20 minutes to 2 hours or more, it just depends on the
eggs. So, this is not for the impatient
crafter, but it is a great alternative that doesn’t harm your beads/stones (at
least none that I know of so far anyway).
*One word of caution if you use Silver Black to blacken your
work: don’t let it touch any of your pearls/beads/stones. Or anything else for that matter – clothes,
fingers, your desk, etc. - I’ve had it turn mine black,….well, dark
gray/brownish. It wasn’t pretty. So if you’re just using a dab of Silver Black
to blacken some stampings you’ve done on metal and you’re just touching it to
one small area, that’s fine, just make sure you avoid all of your pearls, stones,
beads, etc.
If you're interested in further info on darkening your metals (silver copper, brass, etc.), hop on over to the Artisan Whimsy site and watch a little video by Cool Tools that Linda Younkman posted about their Patina Gel.
Okay, some other questions people have asked me recently in regards to my pearls are:
Q: What cord do you use to hand knot your pearls?
A: It really depends on my project(s) but I use Griffin Silk
or Griffin Nylon in various sizes to hand knot most of my regular strands of
pearls or to string vintage and antique strands that clients give me to
re-string/repair and preserve.
I love using C-lon (my pref!) or Superlon nylon
thread/cording (oh the colors of both!)
for my ‘tin-cup’ style of hand knotted necklaces and I’ve used both C-lon and
S-lon along with different sizes of tuff cord for my beaded wrap (Chan Lu
Style) bracelets, too.
All of these
products work fine with little to no stretch or color fading and it’s a
personal preference and usually depends on the stones I’m working with and the
flexibility or stiffness I need/want with each project.
This past year, I’ve become
a major fan of the waxed jewelry cord that Sandra over at “The Knotty Do It All”
has to offer vs. the waxed linen or cotton I’ve found every where else
(Etsy and more). There’s three major
reasons why I like the waxed jewelry cord that Sandra offers over other cords.
First is its ability to be melted/cauterized with a thread zapper or lighter – a great alternative to snipping cord and using glue – woo
hoo!! Even though I’ve had people tell
me and I have even seen them use their thread zapper in videos on regular waxed
linen, I’ve never really had success with it – just burns it, doesn’t really
‘melt’ it into place - but with the
spools of waxed jewelry cord that Sandra offers, you can ‘zap’ away with
success because it’s a synthetic, and not actual linen or cotton.
The second reason is it’s large enough to hold up to some
really large hole pearls, yet small enough to fit through some smaller holed
ones. And, if you twist it just right, you can pull the strands apart and
knot/string with them separately for even tinier holed beads and then join them
back together. Awesome!
And the third reason is that it comes in a nice array of colors that don’t bleed/fade and it’s just waxy enough, but not
overly waxy, which is wonderful.
So, if you’re into waxed linen cord, go check out
Sandra’s Knotty Do It All shop – it’s awesome. So’s the Knotty Do It all Board.
I’ve had my board for three or more years now. I use it all the time and I LOVE
it! And, she just came out with a
smaller, more compact and portable size called the
Little Knotty Do It All board, too – way
cool!!
Plus, Sandra's got a bunch of videos
showing you how to create various designs using the Knotty Do It All Board that are just great, too.
Another Q: Where do you get your larger holed pearls? Do you purchase them from someone or drill
them yourself?
A: I do have a couple of places I purchase my large hole pearls, but this year, my hubby started drilling them for me and he's starting to become my main 'supplier'.
He drills them with my foredoom flex shaft using a little drill press that I purchased from Connie Fox several years back (If you ever get the chance to take a class from Connie - DO IT - She's Awesome!!).
He uses titanium drill bits (and yes, he goes through a
lot of them – so diamond ones would be better I think), and goes very slowly, so as not to burn or chip my pearls, (my babies!!) and makes sure they are moistened with
water while drilling.
I asked him to do this for me so I can provide them in my
Etsy shop to sell and he said ‘NO WAY’.
(What??!??)
He says it’s too hot in the garage (especially this time of year here in
the AZ desert) and that it’s a slow and tedious process that takes patience and
he only does it for me because he loves me and I pay him in Beer! LOL!!
So, sorry, unless I want to start drilling
them all myself I probably
won’t have any large hole pearls for sale in my Etsy shop.
Or, if I ever do, it
will be in extremely limited quantities and possibly only once or twice a year.
I'll give you a 'heads-up' here on the blog and over on both of my Facebook pages should I ever have some listed.
Now, as far as where I purchase my large holed pearls that
we don’t drill ourselves,…well, come back on Sunday to the Pearls! Pearls!!
Pearls!!! Blog Hop to get a list of my suppliers!
(or, check out the link list below and browse through a few of those sites and you might spot some!)
Sorry to make you wait, but part of the blog
hop is listing our suppliers and where we get our pearls so that afterwards we
can all check out new shops and suppliers and shop for more great pearls! (Fun! Fun!)
I hope this has helped with some of the questions you had about
working with pearls in your designs.
For information on how to mix them with
various materials in your jewelry designs, if that’s what you’re creating for
the blog hop, (but remember, it doesn’t have to be jewelry) you can check out
the February 2013 issue of Bead Trends Magazine. I have an article I did
for them in their Jewel School Section on using pearls in your handcrafted
jewelry designs.
And, feel free to click on over to my ‘gallery’ section here
on the blog (button across the top up there under the header) and see some
various designs I’ve created using pearls and other materials.
Or you can check out my
Pearls! Pearls! Pearls! Pinterest Board for some really cool ideas on using
pearls in and on just about everything!
(Gotta love Pinterest!)
If you’ve got any other questions, feel free to post them
here in the comments below or email me (email button at the top right side of
the blog) and I’ll answer you as quickly as I can!
Until Next Time,
Peace, Love and Pearl Talk!
Cheers,